学习ASP.NET Core Blazor编程系列文章之目录
学习ASP.NET Core Blazor编程系列一——综述
学习ASP.NET Core Blazor编程系列二——第一个Blazor应用程序(上)
学习ASP.NET Core Blazor编程系列三——实体
学习ASP.NET Core Blazor编程系列五——列表页面
学习ASP.NET Core Blazor编程系列七——新增图书
学习ASP.NET Core Blazor编程系列八——数据校验
学习ASP.NET Core Blazor编程系列十三——路由(完)
学习ASP.NET Core Blazor编程系列十五——查询
学习ASP.NET Core Blazor编程系列十六——排序
学习ASP.NET Core Blazor编程系列二十——文件上传(完)
学习ASP.NET Core Blazor编程系列二十一——数据刷新
学习ASP.NET Core Blazor编程系列二十二——登录(1)
学习ASP.NET Core Blazor编程系列二十七——JWT登录(1)
十三、实现登出
至此关于Blazor的内容,先写到这里, 我们基本上完成了登入、增加、删除、查询、修改等功能,应对一般的应用,已经足够。今天实现登录功能。有登入,必然要有登出,本文我们来介绍一下如何登出。
1. 在Visual Studio 2022的解决方案资源管理器中,鼠标左键选中“Pages”文件夹,右键单击,在弹出菜单中选择“添加—>Razor组件…”,并将组件命名为“Logout.razor”。登出组件的功能是用于退出登入,返回首面。其代码如下:
@page "/Logout"
@using BlazorAppDemo.Auth;
@inject IAuthService authService
@inject NavigationManager navigation

@code {
    protected override async Task OnInitializedAsync()
    {

        await authService.LogoutAsync();
        navigation.NavigateTo("/");
    }

}
2. 在Visual Studio 2022的解决方案管理器中,使用鼠标左键,双击TokenManager.cs文件,对代码进行修改。具体代码如下:
using BlazorAppDemo.Models; using System.Collections.Concurrent; namespace BlazorAppDemo.Utils { public class TokenManager { private const string TOKEN = "authToken"; private static readonly ConcurrentDictionary<string, UserToken> tokenManager; static TokenManager() { tokenManager=new ConcurrentDictionary<string, UserToken>(); } public static ConcurrentDictionary<string, UserToken> Instance { get { return tokenManager; } } public static string Token { get { return TOKEN; } } public static bool RemoveToken(string token) { if (tokenManager.TryRemove(token,out UserToken delUserToken)) { Console.WriteLine($"delete token {delUserToken.Token}"); return true; } else { Console.WriteLine($"unable delete token {delUserToken.Token}"); return false; } } } }
3.在Visual Studio 2022的解决方案资源管理器中,鼠标左键双击“Api”文件夹中的 “AuthController.cs”文件,将此文件中的Logout方法的代码补全。代码如下:
using BlazorAppDemo.Models; using BlazorAppDemo.Utils; using Microsoft.AspNetCore.Http; using Microsoft.AspNetCore.Identity; using Microsoft.AspNetCore.Mvc; using Microsoft.Extensions.Configuration; using Microsoft.IdentityModel.Tokens; using Newtonsoft.Json.Linq; using System.IdentityModel.Tokens.Jwt; using System.Security.Claims; using System.Text; namespace BlazorAppDemo.Api { [Route("api/[controller]")] [ApiController] public class AuthController : ControllerBase { private readonly IJWTHelper jwtHelper; public AuthController(IJWTHelper _IJWTHelper) { this.jwtHelper = _IJWTHelper; } [HttpPost("Login")] public async Task<ActionResult<UserToken>> Login(UserInfo userInfo) { //Demo用
            if (userInfo.UserName == "admin" && userInfo.Password == "111111") { return BuildToken(userInfo); } else { UserToken userToken = new UserToken() { StatusCode = System.Net.HttpStatusCode.Unauthorized, IsSuccess = false }; return userToken; } } /// <summary>
        /// 建立Token /// </summary>
        /// <param name="userInfo"></param>
        /// <returns></returns>
        private UserToken BuildToken(UserInfo userInfo) { string jwtToken = jwtHelper.CreateJwtToken<UserInfo>(userInfo); //建立UserToken,回传客户端
            UserToken userToken = new UserToken() { StatusCode = System.Net.HttpStatusCode.OK, Token = jwtToken, ExpireTime = DateTime.Now.AddMinutes(30), IsSuccess= true }; return userToken; } [HttpGet("Logout")] public async Task<ActionResult<UserToken>> Logout() { bool flag= TokenManager.RemoveToken(TokenManager.Token); var response = new UserToken(); response.IsSuccess = !flag; return response; } } }
4.在Visual Studio 2022的解决方案资源管理器中,鼠标左键选中“Auth”文件夹中的 “AuthService.cs”文件,将此文件中的LogoutAsync方法中添加如下代码:
using BlazorAppDemo.Models; using BlazorAppDemo.Utils; using Microsoft.AspNetCore.Components.Authorization; using Microsoft.AspNetCore.Identity; using Newtonsoft.Json; using Newtonsoft.Json.Linq; using System.Collections.Concurrent; using System.Net.Http; using System.Text; namespace BlazorAppDemo.Auth { public class AuthService : IAuthService { private readonly HttpClient httpClient; private readonly AuthenticationStateProvider authenticationStateProvider; private readonly IConfiguration configuration; private readonly Api.AuthController authController; private readonly string currentUserUrl, loginUrl, logoutUrl; public AuthService( HttpClient httpClient, AuthenticationStateProvider authenticationStateProvider,
IConfiguration configuration,Api.AuthController authController) { this.authController = authController; this.httpClient = httpClient; this.authenticationStateProvider = authenticationStateProvider; this.configuration = configuration; currentUserUrl = configuration["AuthUrl:Current"] ?? "Auth/Current/"; loginUrl = configuration["AuthUrl:Login"] ?? "api/Auth/Login"; logoutUrl = configuration["AuthUrl:Logout"] ?? "/api/Auth/Logout/"; } public async Task<UserToken> LoginAsync(UserInfo userInfo) { response.Content.ReadFromJsonAsync<UserToken>(); var result = authController.Login(userInfo); var loginResponse = result.Result.Value; if (loginResponse != null && loginResponse.IsSuccess) { TokenManager.Instance.TryAdd(TokenManager.Token, loginResponse); ((ImitateAuthStateProvider)authenticationStateProvider).NotifyUserAuthentication(loginResponse.Token); httpClient.DefaultRequestHeaders.Authorization = new System.Net.Http.Headers.AuthenticationHeaderValue("bearer",
 loginResponse.Token); return loginResponse; } return new UserToken() { IsSuccess = false }; } public async Task<UserToken> LogoutAsync() { var result = authController.Logout(); var logoutResponse = result.Result.Value; ((ImitateAuthStateProvider)authenticationStateProvider).NotifyUserLogOut(); httpClient.DefaultRequestHeaders.Authorization = null; return logoutResponse; } } }
LogoutAsync方法:
- 将token从TokenManger实例中移除
- 通知前面页面更新登录状态
- 将request中的header参数bearer token移除。
5. 在Visual Studio 2022的解决方案管理器中,使用鼠标左键,双击ImitateAuthStateProvider.cs文件,对代码进行修改。具体代码如下:
using BlazorAppDemo.Models; using BlazorAppDemo.Utils; using Microsoft.AspNetCore.Components.Authorization; using System.Net.Http; using System.Security.Claims; namespace BlazorAppDemo.Auth { public class ImitateAuthStateProvider : AuthenticationStateProvider { private readonly IJWTHelper jwt; private AuthenticationState anonymous; private readonly HttpClient httpClient; public ImitateAuthStateProvider(IJWTHelper _jwt, HttpClient httpClient) { anonymous = new AuthenticationState(new ClaimsPrincipal(new ClaimsIdentity())); jwt = _jwt; this.httpClient = httpClient; } bool isLogin = false; string token = string.Empty; public override Task<AuthenticationState> GetAuthenticationStateAsync() { //确认是否已经登录
 UserToken userToken; TokenManager.Instance.TryGetValue(TokenManager.Token,out userToken); string tokenInLocalStorage=string.Empty; if (userToken != null) { tokenInLocalStorage = userToken.Token; } if (string.IsNullOrEmpty(tokenInLocalStorage)) { //沒有登录,则返回匿名登录者
                return Task.FromResult(anonymous); } //將token取出转换为claim
            var claims = jwt.ParseToken(tokenInLocalStorage); //在每次request的header中都将加入bearer token
            httpClient.DefaultRequestHeaders.Authorization = new System.Net.Http.Headers.AuthenticationHeaderValue("bearer",
tokenInLocalStorage); //回传带有user claim的AuthenticationState

            return Task.FromResult(new AuthenticationState(new ClaimsPrincipal(new ClaimsIdentity(claims, "jwt")))); } public void Login(UserInfo request) { //1.验证用户账号密码是否正确
            if (request == null) { isLogin=false; } if (request.UserName == "user" && request.Password == "111111") { isLogin = true; token= jwt.CreateJwtToken<UserInfo>(request); Console.WriteLine($"JWT Token={token}"); } NotifyAuthenticationStateChanged(GetAuthenticationStateAsync()); } public void NotifyUserAuthentication(string token) { var claims = jwt.ParseToken(token); var authenticatedUser = new ClaimsPrincipal(new ClaimsIdentity(claims, "jwt")); var authState = Task.FromResult(new AuthenticationState(authenticatedUser)); NotifyAuthenticationStateChanged(authState); } public void NotifyUserLogOut() { var authState = Task.FromResult(anonymous); NotifyAuthenticationStateChanged(authState); } } }
6. 在Visual Studio 2022的解决方案管理器中,使用鼠标左键,双击MainLayout.razor文件,对代码进行修改。具体代码如下:
@using BlazorAppDemo.Pages @inherits LayoutComponentBase <PageTitle>BlazorAppDemo</PageTitle>

<div class="page">
    <div class="sidebar">
        <NavMenu />
    </div>

    <main>
        <AuthorizeView>
            <Authorized>
              <div class="top-row px-4">


            <a href="https://docs.microsoft.com/aspnet/" target="_blank">About</a>
                <div class ="col-3 oi-align-right"> 你好, @context.User.Identity.Name!<a href="/Logout">Logout</a>
                        </div>
      </div>

        <article class="content px-4"> @Body </article>

            </Authorized>
            <NotAuthorized>
                <div style="margin: 120px 0; width:100%; text-align: center; color: red;">

                    <span style="font-size:20px">检测到登录超时,请重新<a href="/login" style="text-decoration:underline">登录</a>!

</span>
                </div>
                <RedirectToLogin></RedirectToLogin>
            </NotAuthorized>
        </AuthorizeView>

    </main>
</div>
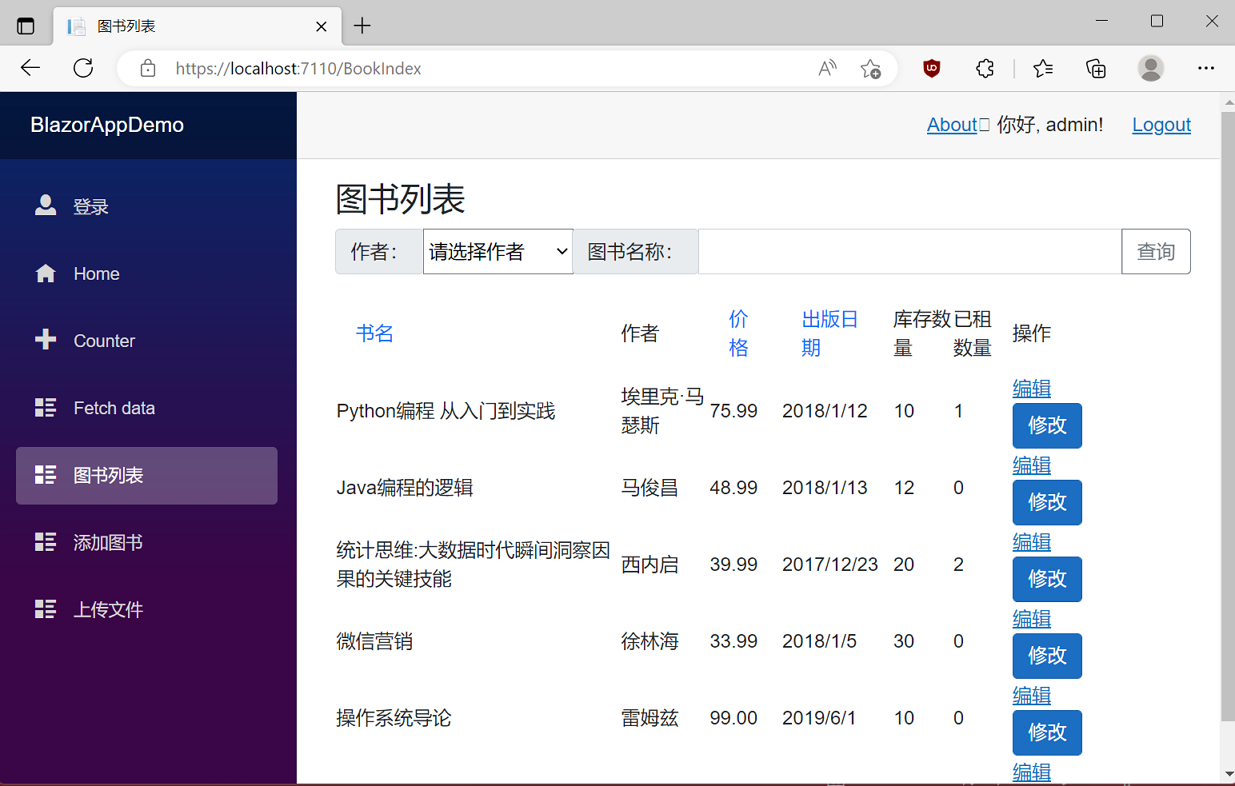
7. 在Visual Studio 2022的菜单栏上,找到“调试–>开始调试”或是按F5键,Visual Studio 2022会生成BlazorAppDemo应用程序。浏览器会打开登录页面。我们在登录页面的用户名输入框中输入用户名,在密码输入框中输入密码,点击“登录”按钮,进行登录。我们进入了系统,在页面的右上角处,会出现登录用户的用户名,与一个“Logout”按钮。如下图。