
缩放SVG文件而不会损失图像质量,因此,SVG文件格式被广泛用于徽标和图标。在某些情况下,您确实需要将 SVG 转换为其他图像文件格式,以便与打印应用程序兼容。
本篇教程,我们将学习如何使用Aspose.CAD for Python via .NET将 SVG 转换为PNG 。这款 3D CAD SDK 有助于实现单个文件和多个文件格式转换的自动化。我们将编写一个完整的代码示例,以演示Aspose.CAD for Python via .NET的可用性和效率。
Aspose.CAD 试用版下载,请联系Aspose官方授权代理商慧都科技
加入Aspose技术交流QQ群(1041253375),与更多小伙伴一起探讨提升开发技能。
3D CAD SDK 安装
Aspose.CAD for Python via .NET专门用于处理 CAD 图纸。它的安装过程非常简单。只需联系慧都科技下载SDK 文件或在 CMD 中运行以下命令:
pip install aspose-cad
使用 Python 将 SVG 转换为 PNG – 代码示例
除了转换功能外,这款强大的 SDK 还允许您选择特定图层并跟踪转换过程。现在,让我们开始查看代码步骤和代码示例。
步骤:
- 通过调用load方法从给定的输入路径加载 SVG 文件。
- 配置光栅化选项以将矢量转换为光栅。
- 设置输出图像的宽度、高度和缩放级别。
- 创建PngOptions类的对象。
- 使用配置的光栅化将加载的 CAD 图像保存为 PNG。
使用下面给出的代码片段在 Python 中将 SVG 更改为 PNG:
import aspose.cad as cad
from aspose.cad.imageoptions import PngOptions

# A class to handle CAD image conversion using Aspose.CAD for Python via .NET
class CadImageConverter:
    def __init__(self, input_path, output_path, license_path):
        # Store input, output, and license file paths
        self.input_path = input_path
        self.output_path = output_path
        self.license_path = license_path
        self.image = None
        self.raster_options = None

    def apply_license(self):
        # Apply the Aspose.CAD license to unlock full functionality
        print("Applying Aspose.CAD license...")
        license_obj = cad.License()
        license_obj.set_license(self.license_path)
        print("License applied successfully.")

    def load_cad_image(self):
        # Load a CAD (or SVG) file from the given input path
        print(f"Loading CAD image froms: {self.input_path}")
        self.image = cad.Image.load(self.input_path)
        print("Image loaded successfully.")

    def configure_rasterization(self, width=800.5, height=800.5, zoom=0.5, layers="Layer"):
        # Configure rasterization options for converting vector to raster
        print("Configuring rasterization options...")
        self.raster_options = cad.imageoptions.CadRasterizationOptions()
         # Set output image width
        self.raster_options.page_width = width
         # Set output image height
        self.raster_options.page_height = height
        # Define zoom level
        self.raster_options.zoom = zoom
        # Specify which layers to render
        self.raster_options.layers = layers
        print("Rasterization configured.")

    def save_as_png(self):
        # Save the loaded CAD image as a PNG using the configured rasterization
        print(f"Saving image as PNG to: {self.output_path}")
        png_options = PngOptions()
        png_options.vector_rasterization_options = self.raster_options
        self.image.save(self.output_path, png_options)
        print("Image saved as PNG successfully.")


def main():
    input_svg = "sample1.svg"
    output_png = "result-file.png"
    license_file = "license.lic"

    # Initialize converter with file paths
    converter = CadImageConverter(input_svg, output_png, license_file)

    # Apply license, load the image, configure rasterization, and save as PNG
    converter.apply_license()
    converter.load_cad_image()
    converter.configure_rasterization()
    converter.save_as_png()


# Run the script if executed directly.
if __name__ == "__main__":
    main()
输出: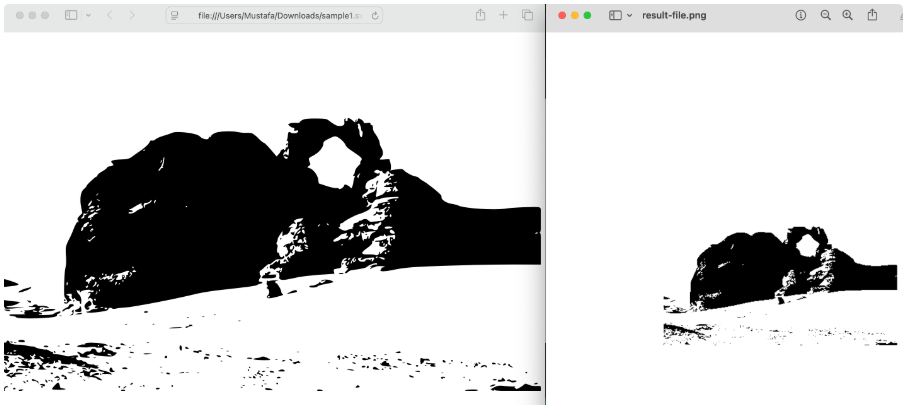
总之,只需几行代码,您就可以为您的应用程序开发一个 SVG 到 PNG 的转换器。我们已经完成了如何在 Python 中以编程方式将 SVG 转换为 PNG 的实现过程。通过 .NET 为 Python 编写的 Aspose.CAD非常直观,您可以根据需要轻松配置流程。
Aspose.CAD 试用版下载,请联系Aspose官方授权代理商慧都科技
加入Aspose技术交流QQ群(1041253375),与更多小伙伴一起探讨提升开发技能。